


Another fast forward. The lower cowling/wing hinges are installed. This went smoothly, and the lower hinge installation was completed in a few hours.
For those who are interested in the details, here are the steps:
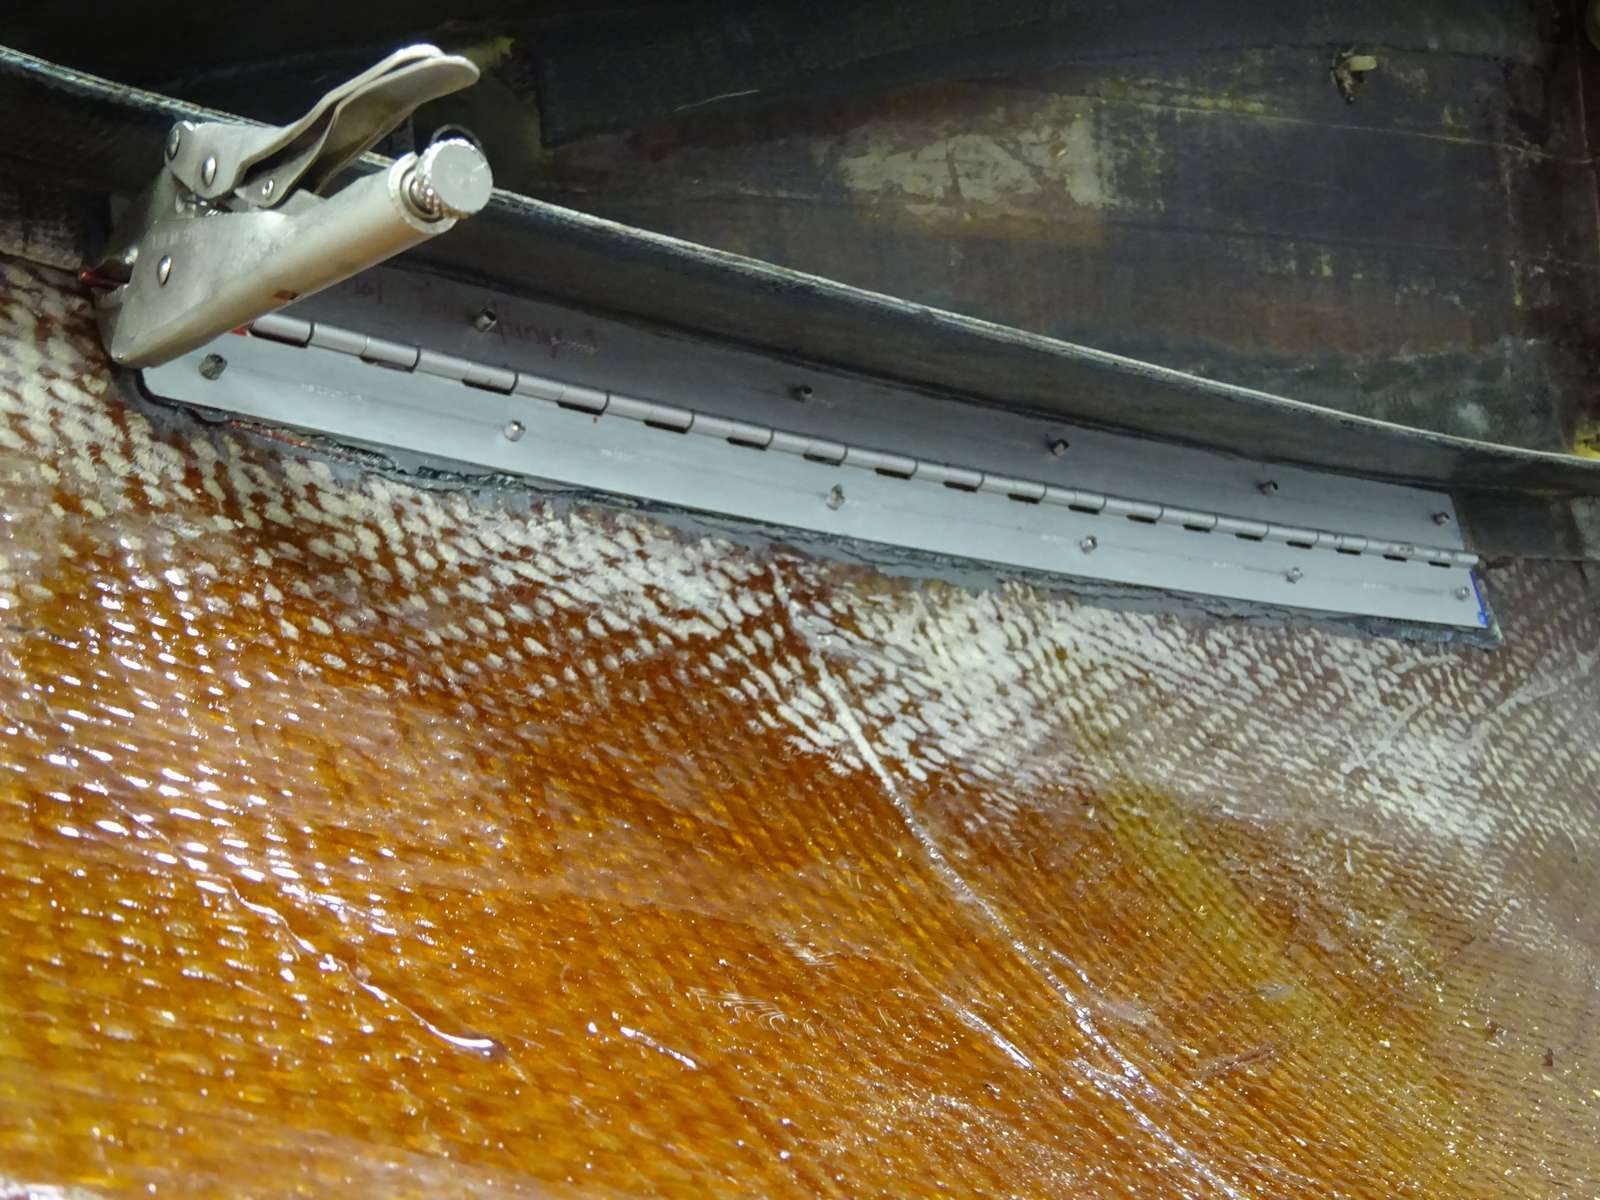
1) We sanded the inner skin along the sides of the lower cowling.
2) We fitted the hinge on the bottom flange.
3) We marked and drilled all the holes on the hinge, itself. Holding the hinge in place, we drilled the holes for the upper hinge half into the flange, installing a cleco after drilling each hole before drilling the next hole. (A best practice that Brett taught us.)
4) We installed the top and bottom cowlings. With the entire cowling held in place by clecos, we used Bondo to secure the lower cowling in position.
5) With the upper cowling in place, we drilled the aft hole on the lower hinge half. We installed a cleco there, then removed the upper cowling.
6) We drilled the remaining flange/cowling holes, again inserting a cleco in each new hole.
7) We removed the bottom half of the hinge and marked the center hinge line.
8) We carefully cut the flange along the hinge line. We saved the trimmed piece for re-use (step 11).
9) We installed the top half of the hinge below the wing with structural epoxy, then pop riveted it in place.
10) We did a dry fit of the lower hinge to make sure that the hinge pin could be removed easily. On the copilot side, we determined that we would need extra thickness on the forward end, near the firewall.
11) We installed the cut portion of the flange onto the cowling with structural (applying structural both on the cowling and on the flange). We located the flange piece by the pre-drilled holes, using a small bolt on either end.
12) We installed the hinge lower half: We applied structural to the back of the hinge, then located it by the small bolts on either end.
13) We put clecos in all the holes, except for the area that needed extra thickness; and there we left the bolt in place.
14) We replaced the clecos with pop rivets. On the extra thick area, we'll leave the bolt in place until the epoxy cures.
Easy-peazy... right? These did go quickly today (between other Tuesday activities, like pickeball and haircuts). Because we used the cut section of the oversized flange to install the lower half of the hinge, we didn't have to wait for another 5-bid layup to cure. That was a bonus!
3/20/2018 Picture 226